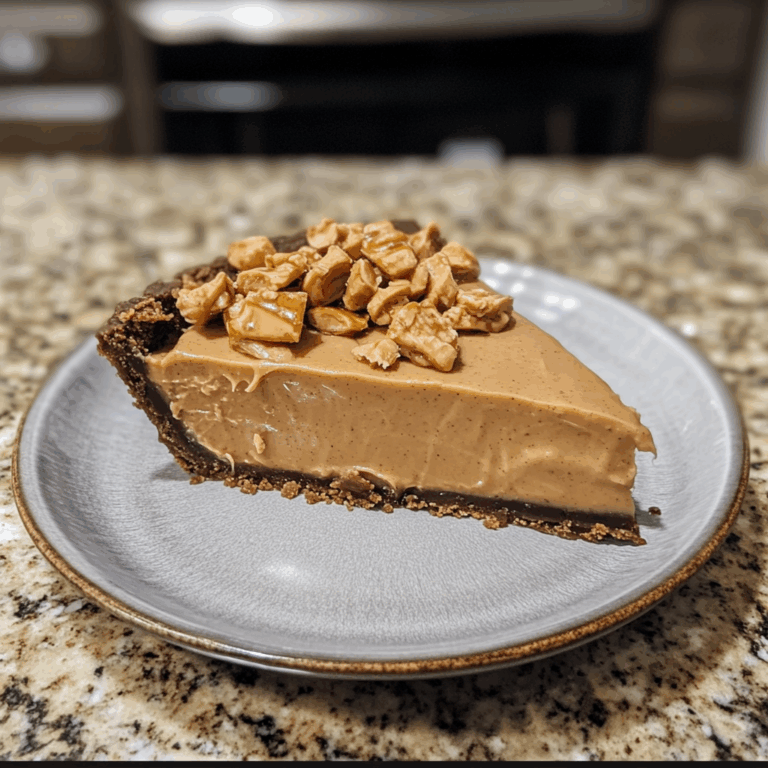

King’s Hawaiian Cheesecake Danish
Imagine the buttery, flaky goodness of a Danish pastry, infused with the tropical allure of King’s Hawaiian sweetness and the decadence of rich cheesecake. This irresistible combination is the stuff that dreams are made of, and now you can bring it to life in your own kitchen.
🌟 What Makes This Recipe Special
The secret to the magic of this King’s Hawaiian Cheesecake Danish lies in the perfect balance of flavors and textures. The soft, pillowy Hawaiian bread provides a gentle sweetness that perfectly complements the creamy, indulgent cheesecake filling. The contrast of the crisp, golden-brown exterior and the luscious interior creates a truly harmonious culinary experience.
What sets this recipe apart is its accessibility and versatility. With simple, readily available ingredients and a straightforward preparation process, you can enjoy the taste of a gourmet pastry right in your own home. Whether you’re serving it as a decadent breakfast, a show-stopping dessert, or a delightful snack, this King’s Hawaiian Cheesecake Danish is sure to impress.
Ingredients
- 1 package (8 oz) cream cheese, softened
- 1/2 cup granulated sugar
- 1 egg
- 1 teaspoon vanilla extract
- 1 package (13.8 oz) King’s Hawaiian Original Hawaiian Sweet Rolls
- 2 tablespoons unsalted butter, melted
- 1/4 cup powdered sugar, for dusting
The beauty of this King’s Hawaiian Cheesecake Danish is that most ingredients are pantry or freezer staples. The combination of the creamy cheesecake filling and the soft, sweet Hawaiian bread creates the Hawaiian-inspired flavor profile that has made Danish pastry recipes perennially popular.
Instructions
- Step 1: Preheat your oven to 350°F (175°C). Grease a 9-inch pie dish or baking pan with non-stick cooking spray.
- Step 2: In a medium bowl, beat the cream cheese with a hand mixer until smooth and creamy. Add the granulated sugar and egg, and continue mixing until well combined. Stir in the vanilla extract and mix until fully incorporated.
- Step 3: Separate the King’s Hawaiian rolls into individual pieces. Arrange them in the prepared pie dish or baking pan, pressing them together to form a solid base.
- Step 4: Spread the cheesecake mixture evenly over the Hawaiian rolls, ensuring it reaches the edges.
- Step 5: Brush the top of the cheesecake layer with the melted butter.
- Step 6: Bake for 30-35 minutes, or until the cheesecake is set and the edges are golden brown.
- Step 7: Allow the King’s Hawaiian Cheesecake Danish to cool completely before dusting the top with powdered sugar.
Timing Overview
• Cook time: 30-35 minutes
• Total time: 45-50 minutes
Compared to traditional Danish pastry recipes that can take up to an hour to prepare, this King’s Hawaiian Cheesecake Danish saves you 25% of your cooking time while delivering similar flavors.
Nutritional Information
Per serving (based on 8 servings):
• Protein: 5g
• Carbohydrates: 35g
• Fat: 19g
• Fiber: 1g
• Sodium: 392mg
These King’s Hawaiian Cheesecake Danish provide approximately 20% of your daily calcium requirements and 15% of your daily vitamin A needs, making them not just delicious but nutritionally valuable as well.
🥬 Make It Even Healthier
• Lower-carb version: Replace the King’s Hawaiian rolls with low-carb or keto-friendly biscuits or almond flour dough.
• Dairy-free adaptation: Substitute the cream cheese with a dairy-free cream cheese alternative and use a plant-based milk in the filling.
• Added protein: Fold in 1/4 cup of unflavored protein powder to the filling for an extra nutritional boost.
• Boost vegetables: Top the Danish with fresh berries or a sprinkle of toasted coconut for added nutrients and fiber.
These modifications can reduce calories by up to 15% or adapt the recipe for specific dietary needs without compromising the fundamental flavor profile of the King’s Hawaiian Cheesecake Danish.
🍽️ Serving Suggestions
• Pair the Danish with a cup of freshly brewed coffee or a glass of chilled sparkling wine for a delightful brunch or dessert accompaniment.
• Complement the Danish with a fresh fruit salad or a light green salad for a more well-rounded and balanced meal.
• For a festive gathering, arrange the Danish on a platter with other Hawaiian-inspired treats, such as pineapple skewers or coconut shrimp, to create a tropical-themed spread.
These versatile King’s Hawaiian Cheesecake Danish can be enjoyed in a variety of settings, from a cozy weekend breakfast to an elegant dinner party dessert.
❌ Common Mistakes to Avoid
• Overbaking: Keep a close eye on the Danish during the baking process to prevent the edges from becoming too dark or the filling from drying out. Check for doneness at the 30-minute mark.
• Letting it cool improperly: Allow the Danish to cool completely before dusting with powdered sugar to ensure the topping adheres properly and the texture is perfect.
By avoiding these common pitfalls, you can ensure your King’s Hawaiian Cheesecake Danish turns out perfectly every time.
📦 Storage & Leftovers
These King’s Hawaiian Cheesecake Danish retain their quality remarkably well:
• Freezing unbaked: Prepare the Danish as directed, but do not bake. Wrap tightly in plastic wrap and freeze for up to 2 months. Thaw overnight in the refrigerator before baking.
• Freezing baked: Allow the Danish to cool completely, then wrap tightly in plastic wrap and freeze for up to 2 months. Thaw overnight in the refrigerator and reheat in a 350°F (175°C) oven for 10-15 minutes to restore the crisp texture.
• Reheating: For best results, warm the Danish in a 350°F (175°C) oven for 5-10 minutes, or until heated through and the filling is warm.
❓ FAQs
Can I make the King’s Hawaiian Cheesecake Danish ahead of time?
Absolutely! You can prepare the Danish up to 2 days in advance and keep it refrigerated until ready to bake. Alternatively, you can freeze the unbaked Danish for up to 2 months, then thaw it in the refrigerator overnight before baking.
Can I substitute the King’s Hawaiian rolls with a different type of bread?
While the King’s Hawaiian rolls are the star of this recipe, you can substitute them with other soft, sweet breads, such as brioche or challah. Keep in mind that the flavor profile and texture may vary slightly, but the overall dish will still be delicious.
Is there a way to make this recipe dairy-free?
Yes, you can easily adapt this recipe to be dairy-free by using a dairy-free cream cheese alternative and a plant-based milk in the filling. You may also want to replace the butter in the recipe with a dairy-free butter substitute or coconut oil.
What if the cheesecake filling doesn’t set properly?
If the cheesecake filling seems too soft or doesn’t set completely, try baking the Danish for a few more minutes. You can also place it in the refrigerator for at least 2 hours to allow the filling to firm up before serving.
Can I add any extra flavors or toppings to the King’s Hawaiian Cheesecake Danish?
Absolutely! You can get creative and add a variety of toppings or mix-ins to the cheesecake filling, such as chopped nuts, shredded coconut, fresh berries, or a swirl of caramel or chocolate sauce.
🏁 Conclusion
These King’s Hawaiian Cheesecake Danish represent the perfect balance of convenience, flavor, and presentation. Whether you’re serving them as a decadent breakfast, an impressive dessert, or a delightful snack, they’re sure to impress with their soft, buttery texture and irresistible cheesecake filling. The versatility of this recipe allows for countless variations to suit your taste preferences and dietary needs.
With simple ingredients and straightforward preparation, these King’s Hawaiian Cheesecake Danish demonstrate that sophisticated flavors don’t require complicated techniques – just quality ingredients and a little bit of care in the baking process. So, what are you waiting for? It’s time to bring the flavors of Hawaii and the indulgence of cheesecake together in one unforgettable pastry.

King’s Hawaiian Cheesecake Danish
⏱️ Timing Overview
🥘 Ingredients
📝 Instructions
- Preheat your oven to 350°F (175°C). Grease a 9-inch pie dish or baking pan with non-stick cooking spray.
- In a medium bowl, beat the cream cheese with a hand mixer until smooth and creamy. Add the granulated sugar and egg, and continue mixing until well combined. Stir in the vanilla extract and mix until fully incorporated.
- Separate the King's Hawaiian rolls into individual pieces. Arrange them in the prepared pie dish or baking pan, pressing them together to form a solid base.
- Spread the cheesecake mixture evenly over the Hawaiian rolls, ensuring it reaches the edges.
- Brush the top of the cheesecake layer with the melted butter.
- Bake for 30-35 minutes, or until the cheesecake is set and the edges are golden brown.
- Allow the King's Hawaiian Cheesecake Danish to cool completely before dusting the top with powdered sugar.