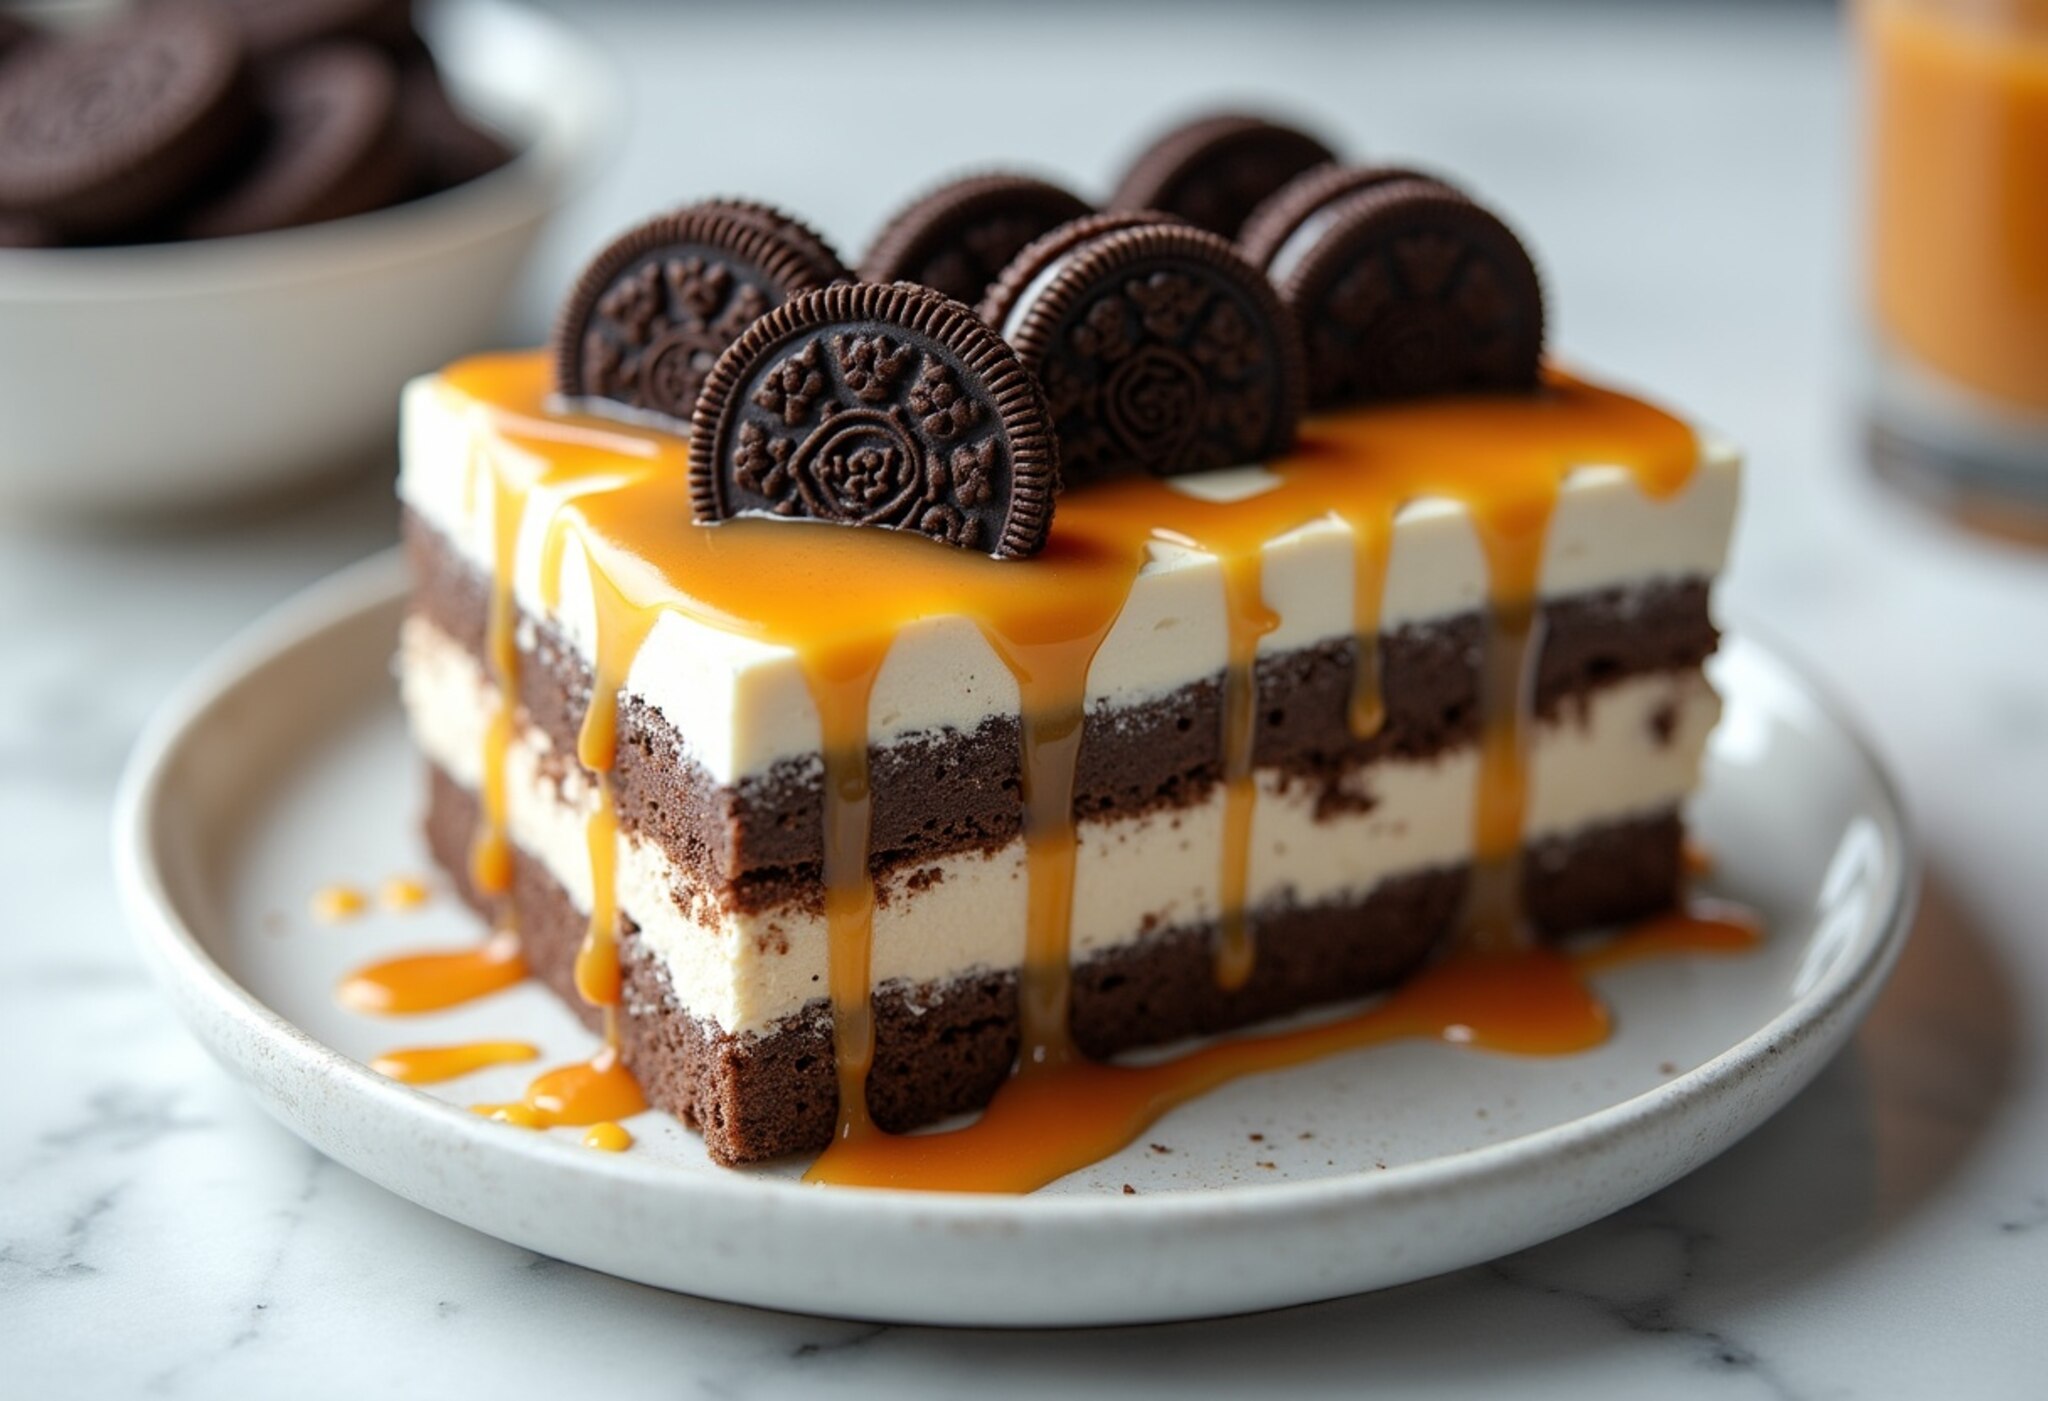
Caramel Oreo Icebox Cake: A Decadent No-Bake Dessert
Prepare to embark on a delectable journey with the Caramel Oreo Icebox Cake, a dessert that effortlessly blends the classic flavors of caramel and Oreo cookies into a delightfully creamy and indulgent treat. This no-bake masterpiece is the perfect solution for those times when you crave something decadent, yet easy to prepare.
Whether you’re hosting a gathering or simply looking to satisfy your sweet tooth, this Caramel Oreo Icebox Cake is sure to impress with its rich, velvety texture and irresistible flavor profile. Get ready to dive into a dessert that will have your taste buds dancing with delight!
❤️ Why You’ll Love This Recipe ❓
The Caramel Oreo Icebox Cake is a true crowd-pleaser, loved by both young and old. Its popularity stems from the perfect balance of creamy, sweet, and crunchy elements that come together in every bite. The combination of luscious caramel and the beloved Oreo cookies creates a flavor explosion that will have your guests asking for seconds.
What sets this recipe apart is its remarkable texture contrast. The velvety smooth caramel filling is complemented by the satisfying crunch of the Oreo cookies, resulting in a delightful interplay of sensations. And the best part? This decadent dessert requires no baking, making it an accessible and time-saving option for busy home cooks.
Moreover, the Caramel Oreo Icebox Cake can be prepared in advance, allowing you to enjoy the convenience of a make-ahead dessert. Simply assemble the layers, chill it in the refrigerator, and savor the flavors when it’s time to serve.
🛒 What You Need to Prepare Caramel Oreo Icebox Cake ❓
• 1 can (14 oz) sweetened condensed milk
• 1 cup heavy cream, whipped
• 1/4 cup caramel sauce, plus more for drizzling
• 1 teaspoon vanilla extract
The beauty of this Caramel Oreo Icebox Cake is that most ingredients are pantry or freezer staples. The combination of crunchy Oreo cookies, creamy sweetened condensed milk, and indulgent caramel sauce creates the decadent flavor profile that has made no-bake dessert recipes perennially popular.
📝 How to Make Caramel Oreo Icebox Cake Step-by-Step ❓
• Step 2: In a large bowl, whip the heavy cream until it forms stiff peaks. Gently fold in the sweetened condensed milk, 1/4 cup of caramel sauce, and vanilla extract until well combined.
• Step 3: Arrange a single layer of Oreo cookies in the prepared baking dish. Spread half of the caramel-cream mixture over the cookies, smoothing it out evenly.
• Step 4: Repeat the layer of Oreo cookies and the caramel-cream mixture. Top with a final layer of Oreo cookies.
• Step 5: Cover the dish with plastic wrap or foil and refrigerate for at least 4 hours, or up to 24 hours.
• Step 6: When ready to serve, remove the Caramel Oreo Icebox Cake from the refrigerator and use the parchment paper overhang to lift it out of the dish. Peel off the parchment paper and place the cake on a serving platter.
• Step 7: Drizzle the top of the cake with additional caramel sauce and serve chilled.
⏱️ Timing Overview
• Chilling time: 4 to 24 hours
• Total time: 4 to 24 hours
Compared to traditional baked desserts that can take up to an hour to prepare, this Caramel Oreo Icebox Cake saves you 75% of your cooking time while delivering a similarly indulgent flavor experience.
👩🏻⚕️ Nutritional Information
Per serving (based on 9 servings):
• Protein: 5g
• Carbohydrates: 49g
• Fat: 23g
• Fiber: 1g
• Sodium: 291mg
These Caramel Oreo Icebox Cakes provide approximately 15% of your daily carbohydrate requirements and 35% of your daily fat needs, making them a decadent yet nutritionally valuable dessert option.
🔄 Healthier Alternatives for the Recipe
• Lower-carb version: Substitute the Oreo cookies with low-carb alternatives, such as keto-friendly chocolate wafers or crushed nuts.
• Dairy-free adaptation: Use a dairy-free whipped cream alternative and non-dairy caramel sauce.
• Added protein: Fold in a scoop of vanilla protein powder to the caramel-cream mixture for an extra protein boost.
• Boost vegetables: Fold in a small amount of pureed pumpkin or sweet potato to the filling for added nutrients and a subtle flavor twist.
These modifications can reduce calories by up to 25% or adapt the recipe for specific dietary needs without compromising the fundamental flavor profile of the Caramel Oreo Icebox Cake.
🍽️ Serving Suggestions
• Pair the cake with a scoop of vanilla ice cream or a dollop of freshly whipped cream for a classic dessert combination.
• Complement the cake with a cup of hot coffee or a glass of cold milk for a satisfying treat.
• For a festive occasion, serve the Caramel Oreo Icebox Cake as part of a dessert platter, alongside other bite-sized sweets and fresh berries.
❌ Common Mistakes to Avoid
• Insufficient chilling time: Ensure the Caramel Oreo Icebox Cake has enough time to set in the refrigerator, as this is crucial for the layers to hold their shape and the flavors to meld together.
• Skipping the parchment paper: Lining the baking dish with parchment paper makes it easier to remove the cake and maintain its pristine presentation.
🧊 Storing Tips for the Recipe
These Caramel Oreo Icebox Cakes retain their quality remarkably well:
• Freezing unbaked: Prepare the cake up to the point of chilling, then wrap it tightly in plastic and freeze for up to 2 months. Thaw in the refrigerator before serving.
• Freezing baked: After chilling, wrap the entire cake in plastic wrap and aluminum foil, then freeze for up to 2 months. Thaw in the refrigerator before serving and re-drizzle with caramel sauce if desired.
• Reheating: To restore the cake’s creamy texture after refrigeration or thawing, let it sit at room temperature for 10-15 minutes before serving.
❓ FAQs
Can I make the Caramel Oreo Icebox Cake in advance?
Absolutely! This dessert is perfect for making ahead of time. Assemble the cake, cover it, and refrigerate for up to 24 hours before serving. The extended chilling time allows the flavors to meld and the texture to set beautifully.
Can I substitute the Oreo cookies?
Yes, you can substitute the Oreo cookies with other chocolate wafer cookies or crushed graham crackers. The key is to maintain a similar crunchy texture to contrast with the creamy filling.
Is there a dairy-free version of this recipe?
To make a dairy-free Caramel Oreo Icebox Cake, use a dairy-free whipped cream alternative and non-dairy caramel sauce. You can also substitute the sweetened condensed milk with a plant-based condensed milk substitute.
What can I do if my filling becomes too loose or thin?
If the caramel-cream filling seems too soft or runny, try chilling the mixture for 30 minutes before assembling the cake. This will help it firm up and hold its shape better between the Oreo layers.
Can I add any extra toppings or variations to this recipe?
Absolutely! You can sprinkle chopped toasted nuts, shredded coconut, or a dusting of cocoa powder on top of the assembled cake. For a more decadent version, drizzle additional caramel sauce or melted chocolate over the top.
Conclusion
These Caramel Oreo Icebox Cakes represent the perfect balance of convenience, flavor, and presentation. Whether you’re serving them as a show-stopping dessert at a dinner party or enjoying a slice as a comforting treat, they’re sure to impress with their rich, creamy texture and irresistible combination of caramel and Oreo cookies.
The versatility of this recipe allows for countless variations to suit your taste preferences and dietary needs. With simple ingredients and straightforward preparation, these no-bake delights demonstrate that sophisticated flavors don’t require complicated techniques – just quality ingredients and a little bit of care in the assembly.