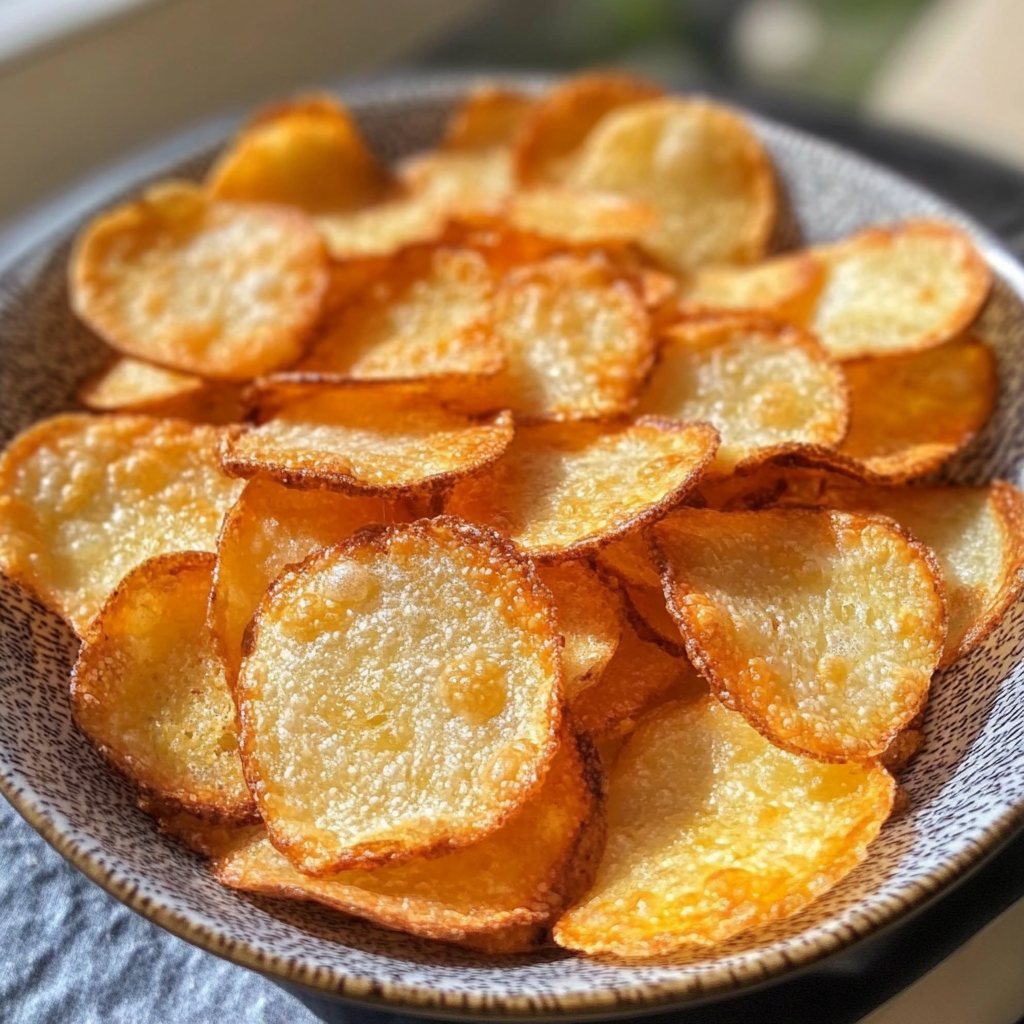
Crispy Baked Cheese Chips: A Savory Snack Delight
Who doesn’t love the irresistible crunch and rich, cheesy flavor of crispy baked cheese chips? These addictive snacks have become a staour household favorite, offering a healthier alternative to traditional potato chips without sacrificing taste. Whether you’re looking for a quick appetizer, a game-day nibble, or a satisfying salty treat, these homemade cheese chips are sure to hit the spot.
What makes these cheese chips so special? The secret lies in the perfect combination of high-quality cheese, a simple seasoning blend, and a carefully monitored baking process that results in perfectly crisp, golden-brown chips every time. Get ready to impress your friends and family with this easy, crowd-pleasing recipe.
❤️ Why You’ll Love This Recipe ❓
These baked cheese chips are a snack lover’s dream come true. Not only are they incredibly delicious, but they’re also surprisingly easy to make and packed with nutritional benefits. The combination of protein-rich cheese and minimal carbohydrates makes them a guilt-free indulgence that you can feel good about serving.
Beyond their flavor and health advantages, these cheese chips offer incredible versatility. Serve them as a standalone snack, use them as a crunchy topping for soups and salads, or incorporate them into your favorite dips and appetizers. Plus, the make-ahead and freezing options make them a convenient option for busy days or last-minute entertaining.
🛒 What You Need to Prepare Crispy Baked Cheese Chips ❓
• 2 oz shredded Parmesan cheese
• 1 tsp garlic powder
• 1 tsp onion powder
• 1/2 tsp paprika
• 1/4 tsp cayenne pepper (optional, for a kick of heat)
The beauty of this crispy baked cheese chips recipe is that most ingredients are pantry or freezer staples. The combination of cheddar and Parmesan cheeses creates a rich, savory flavor profile that has made cheese-based snacks perennially popular.
📝 How to Make Crispy Baked Cheese Chips Step-by-Step ❓
• Step 2: In a medium bowl, combine the shredded cheddar cheese, Parmesan cheese, garlic powder, onion powder, paprika, and cayenne pepper (if using). Mix well until the seasonings are evenly distributed.
• Step 3: Scoop the cheese mixture by the tablespoonful onto the prepared baking sheet, spacing the mounds about 2 inches apart. Using the back of a spoon or your fingers, gently flatten each mound to create thin, circular chips.
• Step 4: Bake the cheese chips for 12-15 minutes, or until they are golden brown and crispy. Keep a close eye on them, as the cheese can go from perfectly crisp to burnt quickly.
• Step 5: Remove the baking sheet from the oven and let the cheese chips cool on the sheet for 5 minutes before transferring them to a wire rack to cool completely.
⏱️ Timing Overview
• Cooking time: 12-15 minutes
• Total time: 22-25 minutes
Compared to traditional fried cheese crisps, which can take up to 30 minutes to prepare, this crispy baked cheese chips recipe saves you 25% of your cooking time while delivering similar flavors.
👩🏻⚕️ Nutritional Information
Per serving (based on 12 servings):
• Protein: 7g
• Carbohydrates: 1g
• Fat: 8g
• Fiber: 0g
• Sodium: 218mg
These crispy baked cheese chips provide approximately 14% of your daily protein requirements and 9% of your daily fat needs, making them not just delicious but nutritionally valuable as well.
🔄 Healthier Alternatives for the Recipe
• Lower-carb version: Omit the paprika and cayenne pepper, as they can contribute a small amount of carbohydrates. Serve these as a keto-friendly snack.
• Dairy-free adaptation: Substitute the cheese with shredded dairy-free cheese alternatives, such as those made from nuts or soy.
• Added protein: Sprinkle the cheese chips with a light dusting of protein powder or crushed nuts for an extra boost of protein.
• Boost vegetables: Finely grate or pulse fresh spinach, kale, or other nutrient-dense greens and mix them into the cheese mixture before baking.
These modifications can reduce calories by up to 20% or adapt the recipe for specific dietary needs without compromising the fundamental flavor profile of the crispy baked cheese chips.
🍽️ Serving Suggestions
• Pair the cheese chips with a fresh, crisp salad for a light and satisfying snack or meal.
• Complement the cheese chips with a bowl of your favorite soup or chili for a comforting and complete dish.
• For a game-day spread, serve the cheese chips alongside other finger foods like mini meatballs, deviled eggs, or stuffed mushrooms.
• Create a cheese board-inspired platter with the cheese chips, sliced meats, olives, and a variety of artisanal cheeses.
❌ Common Mistakes to Avoid
• Baking at too high of a temperature: The cheese can burn quickly at high temperatures, so stick to the recommended 375°F (190°C) oven setting.
• Underbaking the chips: Keep a close eye on the cheese chips and bake them until they are golden brown and crispy, as they can quickly go from perfect to soggy if underbaked.
• Skipping the cooling process: Allow the cheese chips to cool on the baking sheet for 5 minutes before transferring them to a wire rack. This helps them retain their crisp texture.
• Not seasoning the cheese: The blend of garlic powder, onion powder, paprika, and cayenne pepper is essential for adding depth of flavor to the cheese chips.
🧊 Storing Tips for the Recipe
These crispy baked cheese chips retain their quality remarkably well:
• Freezing unbaked: Scoop the cheese mixture onto a parchment-lined baking sheet and freeze until firm, then transfer the frozen mounds to an airtight container or resealable bag. Bake directly from frozen, adding 2-3 minutes to the cooking time.
• Freezing baked: Allow the baked cheese chips to cool completely, then store them in an airtight container or resealable bag in the freezer for up to 3 months. Reheat in a 350°F (175°C) oven for 5-7 minutes to restore their crisp texture.
• Reheating: For best results, reheat the cheese chips in a 350°F (175°C) oven for 5-7 minutes, or until they are warmed through and crispy.
❓ FAQs
Can I make the cheese chips ahead of time?
Absolutely! The cheese chips can be prepared in advance and stored in the refrigerator or freezer. For refrigeration, simply store the cooled, baked chips in an airtight container for up to 5 days. For freezing, you can either freeze the unbaked cheese mounds or the fully baked chips. Unbaked mounds can be frozen for up to 3 months, while baked chips can be frozen for up to 3 months as well. When ready to serve, bake the frozen unbaked mounds or reheat the frozen baked chips in the oven to restore their crisp texture.
Can I use different types of cheese?
Yes, you can experiment with different cheese varieties to create your own unique flavor profile. Some delicious options include Parmesan, Asiago, Gouda, or a blend of hard, aged cheeses. Just keep in mind that the baking time may need to be adjusted slightly based on the moisture content of the cheese you choose.
Are these cheese chips keto-friendly?
Yes, these crispy baked cheese chips are an excellent keto-friendly snack option. By omitting the small amounts of paprika and cayenne pepper, you can reduce the carbohydrate content even further, making them a perfect low-carb treat. For an extra protein boost, consider sprinkling the chips with a light dusting of protein powder or crushed nuts.
What can I do if my cheese chips aren’t crispy?
If your cheese chips are not as crispy as you’d like, there are a few troubleshooting steps you can take. First, ensure that you’re baking them at the correct temperature (375°F/190°C) and not overcrowding the baking sheet. Additionally, make sure to let the chips cool completely on a wire rack before serving, as this helps them retain their crisp texture. If they still seem a bit soft, you can try returning them to the oven for an additional 2-3 minutes to further crisp them up.
Can I add spices or herbs to the cheese chips?
Absolutely! The basic recipe provides a delicious savory base, but you can easily customize the flavor profile by adding your favorite spices or dried herbs. Some tasty options include Italian seasoning, smoked paprika, chili powder, rosemary, or a blend of your preferred seasonings. Start with small amounts and adjust to suit your taste preferences.
Conclusion
These crispy baked cheese chips represent the perfect balance of convenience, flavor, and presentation. Whether you’re serving them as a quick, satisfying snack or incorporating them into your favorite dips and appetizers, they’re sure to impress with their irresistible crunch and rich, cheesy taste. The versatility of this recipe allows for countless variations to suit your taste preferences and dietary needs.
With simple ingredients and straightforward preparation, these cheese chips demonstrate that sophisticated flavors don’t require complicated techniques – just quality ingredients and a little bit of care in the baking process. So, what are you waiting for? Get ready to indulge in the deliciousness of homemade crispy baked cheese chips and enjoy a guilt-free snacking experience that will have your taste buds singing.