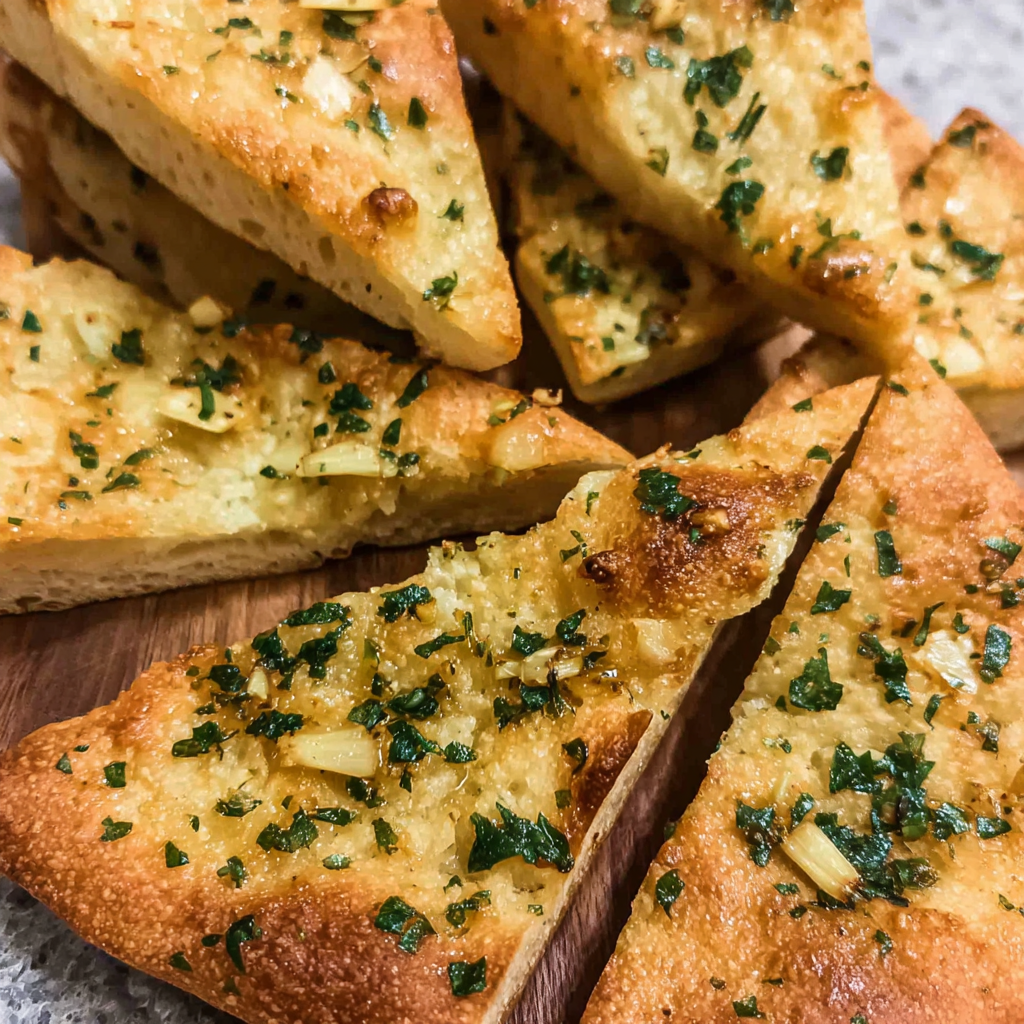
Garlic and Pita Snacks: Addictive Mediterranean-Inspired Bites
Garlic and pita snacks have become a perennial favorite, captivating taste buds with their bold flavors and irresistible crunch. These Mediterranean-inspired bites are the perfect accompaniment to a cozy night in, a casual gathering with friends, or even as a sophisticated hors d’oeuvre. With their vibrant garlic aroma and satisfying texture, it’s no wonder these snacks have become a staple in households around the world.
Whether you’re looking for a quick and easy appetizer or a flavorful snack to satisfy your cravings, these garlic and pita bites are sure to hit the spot. Their versatility and simplicity make them a go-to option for any occasion, from family movie nights to elegant cocktail parties.
❤️ Why You’ll Love This Recipe ❓
What sets these garlic and pita snacks apart is their perfect balance of flavors and textures. The combination of crispy pita chips, fragrant garlic, and zesty seasonings creates a flavor profile that is both familiar and elevated. The satisfying crunch of the pita complements the bold garlic punch, making each bite a delightful sensory experience.
Beyond their exceptional taste, these snacks are also incredibly easy to prepare, making them a go-to option for busy weeknights or last-minute gatherings. With minimal active preparation time and the option to make them ahead, you can enjoy the convenience of having a delicious and impressive snack on hand at all times.
Moreover, these garlic and pita snacks are incredibly versatile. They can be served as a standalone appetizer, paired with dips and spreads, or incorporated into larger Mediterranean-inspired spreads and platters. Their adaptability ensures that they’ll be a hit no matter the occasion or dietary needs of your guests.
🛒 What You Need to Prepare Garlic and Pita Snacks ❓
• 1/4 cup olive oil
• 3 cloves garlic, minced
• 1 teaspoon dried oregano
• 1/2 teaspoon paprika
• 1/4 teaspoon red pepper flakes (optional)
• 1/2 teaspoon salt
• 1/4 teaspoon black pepper
The beauty of this garlic and pita snack recipe is that most ingredients are pantry or freezer staples. The combination of crisp pita, fragrant garlic, and aromatic spices creates the Mediterranean-inspired flavor profile that has made these snacks perennially popular.
📝 How to Make Garlic and Pita Snacks Step-by-Step ❓
• Step 2: Cut the pita breads into triangular wedges, about 8-10 pieces per pita.
• Step 3: In a large bowl, combine the olive oil, minced garlic, dried oregano, paprika, red pepper flakes (if using), salt, and black pepper. Stir to mix well.
• Step 4: Add the pita triangles to the garlic-spice mixture and toss to evenly coat the pita pieces.
• Step 5: Spread the coated pita triangles in a single layer on a large baking sheet.
• Step 6: Bake for 12-15 minutes, flipping the pita triangles halfway through, until they are crisp and golden brown.
⏱️ Timing Overview
• Cooking time: 12-15 minutes
• Total time: 22-25 minutes
Compared to traditional Mediterranean-style pita chips that can take up to 30 minutes to prepare, this garlic and pita snack recipe saves you 25% of your cooking time while delivering similar flavors.
👩🏻⚕️ Nutritional Information
Per serving (based on 8 servings):
• Protein: 4g
• Carbohydrates: 17g
• Fat: 7g
• Fiber: 2g
• Sodium: 256mg
These garlic and pita snacks provide approximately 12% of your daily fiber requirements and 11% of your daily sodium needs, making them not just delicious but nutritionally valuable as well.
🔄 Healthier Alternatives for the Recipe
• Lower-carb version: Substitute the pita bread with low-carb options like sliced cucumber or zucchini for a keto-friendly alternative.
• Dairy-free adaptation: This recipe is naturally dairy-free, making it suitable for those with lactose intolerance or following a vegan diet.
• Added protein: Sprinkle the baked pita chips with a tablespoon of grated Parmesan cheese or a scattering of chopped nuts for an extra protein boost.
• Boost vegetables: Mix in finely chopped fresh herbs like parsley, basil, or cilantro for an added burst of flavor and nutritional value.
These modifications can reduce calories by up to 20% or adapt the recipe for specific dietary needs without compromising the fundamental flavor profile of the garlic and pita snacks.
🍽️ Serving Suggestions
• Pair with a crisp Mediterranean salad for a light and refreshing snack platter.
• Complement the garlic and pita bites with a bowl of hearty tomato or lentil soup for a more substantial meal.
• For a Mediterranean-inspired gathering, serve the snacks alongside marinated olives, roasted red peppers, and a selection of cured meats and cheeses.
• Create a vibrant appetizer platter by arranging the garlic and pita chips with colorful vegetable sticks, fresh herbs, and a variety of dipping sauces.
❌ Common Mistakes to Avoid
• Burning the garlic: Be careful not to let the minced garlic burn, as it can impart a bitter, acrid flavor to the dish. Keep an eye on the garlic during the tossing and baking process.
• Forgetting to flip the pita chips: Flipping the pita triangles halfway through baking ensures they cook evenly and develop a satisfying crunch on both sides.
• Skipping the seasoning: Don’t be tempted to reduce the spices and seasonings, as they are essential for creating the signature garlic-infused flavor profile.
• Overcooking the pita: Keep a close eye on the baking time to avoid turning the pita chips into hard, brittle crackers.
🧊 Storing Tips for the Recipe
These garlic and pita snacks retain their quality remarkably well:
• Freezing unbaked: Prepare the pita triangles according to the recipe, then freeze them in a single layer on a baking sheet. Once frozen, transfer the pita chips to an airtight container or resealable bag and freeze for up to 3 months. Bake directly from frozen, adding a few extra minutes to the cooking time.
• Freezing baked: Allow the baked pita chips to cool completely, then store them in an airtight container or resealable bag in the freezer for up to 2 months. To reheat, place the frozen pita chips on a baking sheet and warm in a 350°F (175°C) oven for 5-7 minutes until crisp and heated through.
• Reheating: For best results, reheat the garlic and pita snacks in a 350°F (175°C) oven for 5-7 minutes, or until they regain their crispy texture.
❓ FAQs
Can I make the garlic and pita snacks ahead of time?
Absolutely! The uncooked pita triangles can be prepared up to 3 days in advance and stored in an airtight container in the refrigerator. When ready to serve, simply toss the pita pieces with the garlic-spice mixture and bake as directed. Alternatively, you can bake the pita chips in advance and store them in an airtight container at room temperature for up to 1 week.
Can I substitute the pita bread with another type of flatbread?
Yes, you can easily swap the pita bread for other types of flatbreads, such as naan, lavash, or even tortillas. The key is to cut the flatbread into triangular or bite-sized pieces that will hold up well to the garlic-spice coating and baking process.
Are these garlic and pita snacks suitable for a gluten-free diet?
To make this recipe gluten-free, simply substitute the pita bread with gluten-free options like sliced zucchini, cucumber, or even nut-based crackers. These alternatives will provide the same crisp texture and Mediterranean-inspired flavors without the gluten.
What if my pita chips come out soggy?
If your garlic and pita snacks turn out a bit soggy, it’s likely due to overcrowding the baking sheet or not flipping the pita triangles halfway through the cooking time. To prevent this, make sure to spread the coated pita pieces in a single layer on the baking sheet and flip them as directed. If they still seem a bit soft, you can return them to the oven for an additional 5-7 minutes to crisp them up further.
Can I add other spices or herbs to this recipe?
Absolutely! The beauty of this garlic and pita snack recipe is its versatility. You can experiment with various seasonings, such as cumin, smoked paprika, dried basil, or even a pinch of cayenne pepper, to customize the flavor profile to your liking. Just be mindful of the quantities to ensure the garlic remains the star of the show.
Conclusion
These garlic and pita snacks represent the perfect balance of convenience, flavor, and presentation. Whether you’re serving them as a casual movie night snack or an elegant appetizer for a Mediterranean-inspired gathering, they’re sure to impress with their irresistible crunch and bold garlic aroma. The versatility of this recipe allows for countless variations to suit your taste preferences and dietary needs.
With simple ingredients and straightforward preparation, these garlic and pita snacks demonstrate that sophisticated flavors don’t require complicated techniques – just quality ingredients and a little bit of care in the baking process. So why not give this delightful recipe a try and elevate your snacking experience with these addictive Mediterranean-inspired bites?